This is a collection of tools we have found useful for participatory meetings and workshops. We've categorised the tools, but many of them can also be useful in other contexts. Don't be bound by our categories! You might also find our guides on Facilitating Workshops and Facilitating Meetings useful.
When choosing tools you might want to think about:
Variety: Using a variety of techniques will help a much wider range of people engage fully in your workshop or meeting. We all vary in things like how we take in information most easily, whether we prefer to speak in large groups or small ones, whether we need to move our bodies for our minds to stay active, how much reflection time we need to make up our minds on a topic... Building in a range of different activities will enable more people to stay involved.
Accessibility: It is important to remember that not every activity will be accessible to every individual or group. Wherever possible, ask people to give you information in advance about any access requirements that are relevant to the workshop. Make sure you are only asking for information you really need in order to facilitate - no-one should feel expected to share personal information unnecessarily. Ask people to be specific about how to make things work for them, rather than you making assumptions. Try to choose tools where everyone will at least have a choice about whether to participate.
Consent: Even if everyone could take part in all the activities you've planned, be aware that not everyone will want to! Give people a rough idea of what a tool will involve and why you are suggesting it so they can decide how / whether to join in. For example, you could let people know that a game involves some physical contact, or lots of moving around. If people are having personal conversations in pairs, tell them in advance what kind of feedback you will be expecting in the larger group.
It can be tempting to plunge straight in to the content of your workshop or meeting from the very beginning of the session. After all, there often isn't enough time to 'cover' everything we want to. However, most people are able to participate more fully if you devote a bit of time to sharing information and creating a welcoming space. At a minimum, people need to know where the toilets and kitchen are! Most participants will also benefit from getting to know each other a little.
Giving time to building trust and relationships enables people to take more risks. 'Risk' in this context doesn't mean sky-diving or driving without a seatbelt! We are talking about the kinds of small risks which help a workshop or meeting be productive. If someone doesn't trust the rest of the group then all kinds of behaviour could feel too risky: contributing to discussion in the whole group, asking questions when they don't understand, expressing disagreements, exploring challenging issues or just having a go at a new skill.
Most people develop trust most effectively when the level of risk and exposure increases gradually throughout the session. It can be counter-productive to ask too much of people at the very beginning. This section covers trust and relationship exercises that are suitable for the start of a session and mostly involve the sharing of basic personal information. See Trust building exercises below for more challenging exercises and in depth guidance.
Make it as easy as possible for people to share relevant personal information when they introduce themself - and equally to not share it, if that's what they prefer! It is rarely helpful to put someone on the spot and push them to talk about themself - and especially not at the very start of a session. Think carefully about the words you choose and the examples you give, so people feel they have a choice about what to share.
30 seconds - 1 minute per person; 3 - 20 people
Each person gets a chance to introduce themselves in turn. Many people will be more relaxed if they know a bit more information about everyone else in the room. For example, you could ask each person to explain in one sentence why they've come to the meeting, or how they are feeling today. You can also add less 'functional' questions, such as 'What's your favourite vegetable?' or 'Share something good that happened to you in the last month.'
5 seconds per person; 2 - 30 people
Pronouns are words like 'he/his' and 'she/her' that we use to refer to people, instead of repeating their name lots of times. For example: "Elham said she's happy for us to use her car" is easier to say than "Elham said Elham is happy for us to use Elham's car."
The difficulty with pronouns is that they are often used without checking how someone actually wants to be called.For example, someone who is read by others as a 'she' may in fact use 'he', or gender neutral pronouns like 'they' (or a range of consciously created alternatives like ze and zir).
For this reason, many groups like to start meetings with a pronoun round where people get the option to tell everyone what pronouns they use, in the same way they tell people their name. Even if people forget and make mistakes, it is easier to correct them if the introduction happened at the start.
If you are introducing a pronoun round in a group that is new to it, make sure you explain what you are asking of people and why. If people don't understand what is going on, they may feel confused or make a joke of it, which is counter-productive when you want to create a culture of respect. Making it optional for people to share their pronoun may help people who feel put on the spot - for example because they are questioning their gender and don't feel ready to be public about that.
This involves creating space for people to share information that they need other participants to know in order for them to participate effectively. It can also be helpful in encouraging an atmosphere where people feel able to ask for what they need. Examples:
“Please can people speak loud and clear.”
“I'm keeping my phone on because my child isn't well, and I need to get back quickly if the baby-sitter calls.”
“I've been having a rough time recently, if I leave the room it’s because I need a bit of space, don't feel you have to come and check up on me.”
The usual set up for this tool is to give each person in turn one chance to speak, often going in order round the room (see Go-rounds). It can help if you model as a facilitator by giving some examples, especially if they are true for you. Be clear that the objective is for people to share information or make requests if it is useful to them, and that it is fine for people to pass if their needs are being met, or they just prefer not to say anything. Explain why you are asking for the information to encourage people to take it seriously and create a respectful atmosphere.
You could also give people the option to talk to you privately. If you say this, make sure there is a break or small group exercise near the start of the session, so that people definitely have the opportunity for an inconspicuous chat.
Name labels which are attached to clothing are an easy way to help people get each other's names right. As people arrive offer sticky labels and pens for people to write up their own names.
You could ask people to add their pronoun (see Pronoun rounds above). If you are not sure whether everyone is familiar with the concept, it may be better to explain it first, before asking people to write their name label.
If you have the resources you can have name labels prepared and hand them out at the start. However, this requires good records of who will be attending - make sure to spell names correctly.
10 - 20 minutes; 10 - 30 people
This gives people the chance to have a more in depth introductory conversation with one other person, potentially with a shorter whole group introduction as a follow up.
Facilitators often invite people to introduce their partners in the whole group round (rather than introducing themselves). In our experience, this method can be quite 'exposing' for both people. The person introducing their partner may feel awkward about whether they have remembered right. People being introduced may prefer to choose what they say to the whole group, and be concerned about being misrepresented. If you want to follow the paired exercise with a whole group introduction, you could ask pairs to choose whether to introduce each other, or themselves.
30s - 5 minutes per person; 3 - 30 people
In a check-in each person shares something about how they are. This could be very brief, for example one or two words about how they're feeling at that moment. Alternatively, it could be a chance for people to say more about what's going on in their lives. A more specific check in could be focused on people's feelings about the shared project they are working on together.
Check-ins are beneficial in a number of ways. They can help people get to know each other, especially if done regularly. Check-ins can also be a good way for people to voice their distractions and set them aside. For some people, focusing on their feelings can help them to be more aware of what they need in order to feel better (or in order to not 'take it out on' other people in the meeting!).
Hearing how people are can help others in the group take things less personally - for example, if someone is having a hard time, others might be ready to forgive them being impatient in a meeting.
Finally it can help the facilitator to read the mood of the room - for example, if lots of people are anxious about the same thing, then it could be brought forward on the agenda. A check-in at the start and end of a workshop or meeting can also help you gauge how the session has affected people.
Ask each person in turn to share their feelings, or distractions and events that are on their mind. For example: “I’m nervous and finding it hard to concentrate, because I've got a presentation to do this afternoon.” “My first grand-child was born last week.” If the group is large, you might be more structured, for example by asking people to share just three words about how they are feeling.
Ask everyone to give their full attention to the speaker. If there is time, the facilitator could prompt people with questions: “Is there anything the rest of us could do that would help?” “Is there anything else you want to want us to know about that?” The point is to support the speaker, not to probe them to disclose more than they feel comfortable saying!
People will have very different comfort zones when it comes to talking about emotions! That means that this tool is likely to work very differently for different people in your group. It can still be worthwhile, even if not everyone benefits. However, if you are using it regularly, try asking for feedback on whether people find it helpful, and if you need to tweak your format.
30 seconds - 2 minutes per person; 3 - 20 people
People share something personal and positive that has happened to them recently. Examples are: “I've harvested the first peas of the year”, “My friend from New Zealand came to visit,” “I've got a new job”. This can create a lot of positive energy for the meeting and put people more in touch with each other's lives.
You can use this instead of introductions when people already know each other. Make sure people keep it brief. Discourage comments or questions. Don't confuse excitement sharing with announcements. Be aware that not everyone may have something they feel excited about - make sure there is the option to pass.
An agenda is a list of items you expect to cover in a meeting. Some people also use this word for a list of the topics that will be covered in a workshop. Having a list printed out, or displayed on the wall helps people know what to expect from the session - and can keep people focused as you move through it.
Exactly how an agenda should be created and shared depends a lot on your situation.
In a meeting it is more democratic if everyone who is affected by the decisions can put items on the agenda. This can be done in advance, which helps to save limited face to face time, and allows people to think about the agenda items before the meeting starts. On the other hand, it's not always easy for people to engage before they turn up, and it may be more inclusive to draw up it up together at the beginning of the meeting.
In a workshop the trainer may have more information about the topic than the participants, and decide what to cover, then simply inform people. However, the training may be more relevant to people if they have a chance to say what topics they are interested in - whether in advance, or at the start.
1 - 2 minutes to set up; any number of people
This makes sure all ideas and questions get recorded and participants don't feel like they've been ignored. Whenever anything comes up that's not relevant to the discussion at hand 'park' it in the parking space (a large sheet of paper on the wall). In other words write it up on the paper and deal with it later. This allows you to stay focussed but reassures participants they will be heard. Of course, if you want to avoid people feeling ignored, make sure you do deal with parked items! Allow time at the end of the workshop or meeting agenda to deal with the parking space.
5 - 10 minutes; 5 - 40 people
In this exercise people place themselves around the room to create a human 'map' of where they currently live.
It is often used as a way to put people in touch with others who live near them, so they can make links / stay in touch after the session.
Sometimes the different places people live will be a factor in group dynamics. For example, people in a major city can forget that some people travel in from outlying towns and villages. This tool can be a way of making those dynamics more visible, and potentially opening up discussion about them.
A more personal variation would be ask people to decide where to stand based on the place they consider to be their home. Be aware that for many people 'home' will be several places, or no-where, making it hard to decide where to stand! In general, the question of 'where is your home' is likely to bring up very different levels of emotion for different people, so think carefully about whether this is helpful.
10 - 20 minutes; 5 - 40 people
A flexible icebreaker. Everyone has a list of questions, and needs to find answers from different people for each one. How many questions you ask depends on how involved the answers are, but ten would usually be a maximum.
A common variation is to replace the open questions with a 'find somebody who' list. For example, the card could say 'find somebody who: has three children; is scared of snakes; missed breakfast this morning' etc. Participants then need to find a different name for each of the questions. This version of the game is faster-paced, but the conversations are repetitive! Also, it doesn't serve as well for people getting to know each other, because the information shared is very limited, and people don't get to choose what it is.
The objective of mixing people up and getting them talking could be achieved without a competitive edge by doing a mingle or carousel. Usually, bingo allows less time for each individual conversation, which has the advantage of mixing people up more in a shorter time, and the disadvantage that the conversations are less in depth.
10-15 minutes; 3-12 people
A get-to-know-you game that doesn't involve anyone moving from their seat. In a group larger than about 12, you could split people into smaller groups to play this game to ensure it doesn’t take too long.
Many of these techniques will help make more space in a discussion for people who are less likely to contribute. They can also be used to formally explore group dynamics.
Be aware that for some people these kinds of exercises will feel artificial, or 'like being at school'. These people might become less keen to participate, not more! Notice what's going on in your group, and if the tools aren't having the effect you wanted, try something else!
Using hand-signals can make workshops and meetings run more smoothly and help the facilitator see emerging agreements and common ground.
Hand-signals are agreed gestures or shapes that people make with their hands, to communicate in a non-verbal way (e.g. "I want to speak", "I agree", "I don't understand" etc.) For example:
 Raise a forefinger when you wish to contribute to the discussion with a general point.
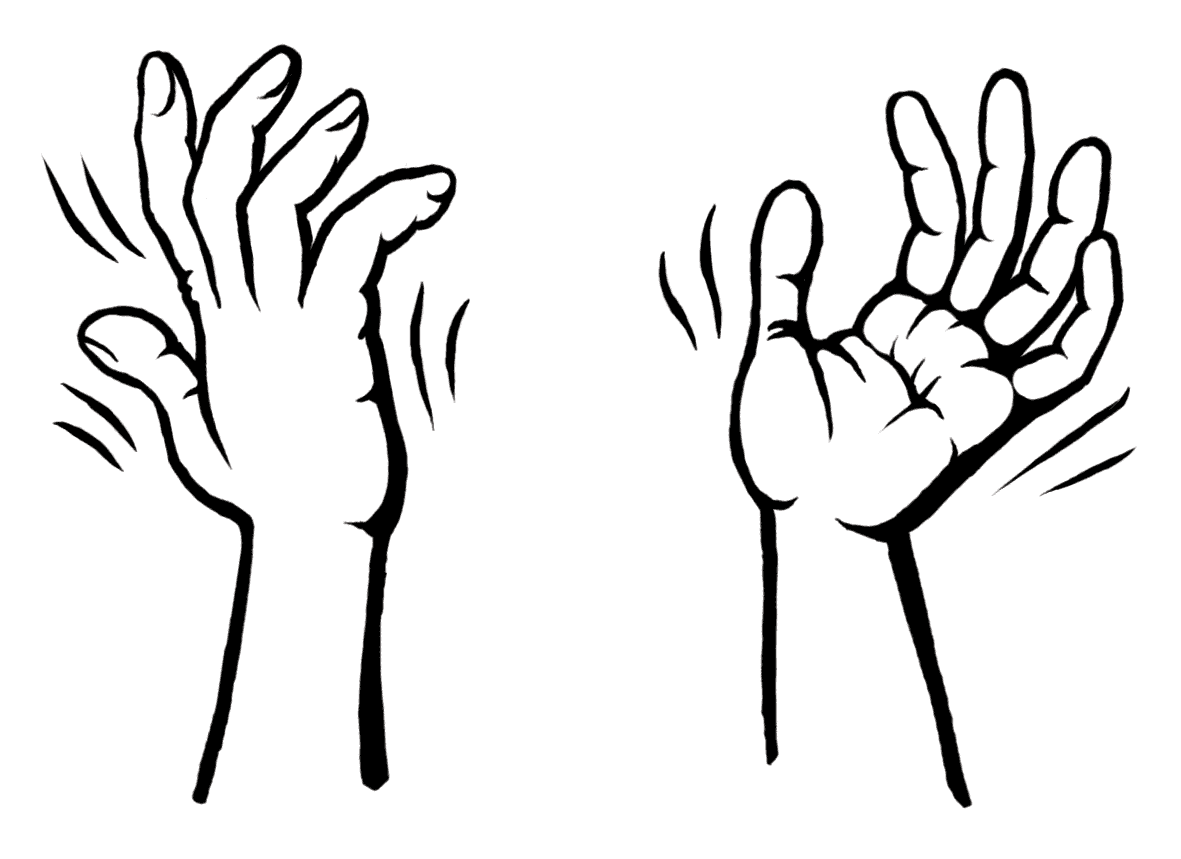 Silent applause – when you hear an opinion that you agree with, wave your hands with your fingers pointing upwards (this saves a lot of time as people don't need to chip in to say “I'd just like to add that I agree with...”).
 Raise both forefingers if your point is a direct response to a point that's just been made or a question that's just been asked. This allows you to jump to the head of the queue, in front of all those people raising just one finger. For example, if the group is discussing which train to catch, it could be helpful to jump the queue to tell people that the trains are on strike, and you will need to catch the bus. NB: This option can easily be over-used if people don't fully understand how it is different from raising a single hand.
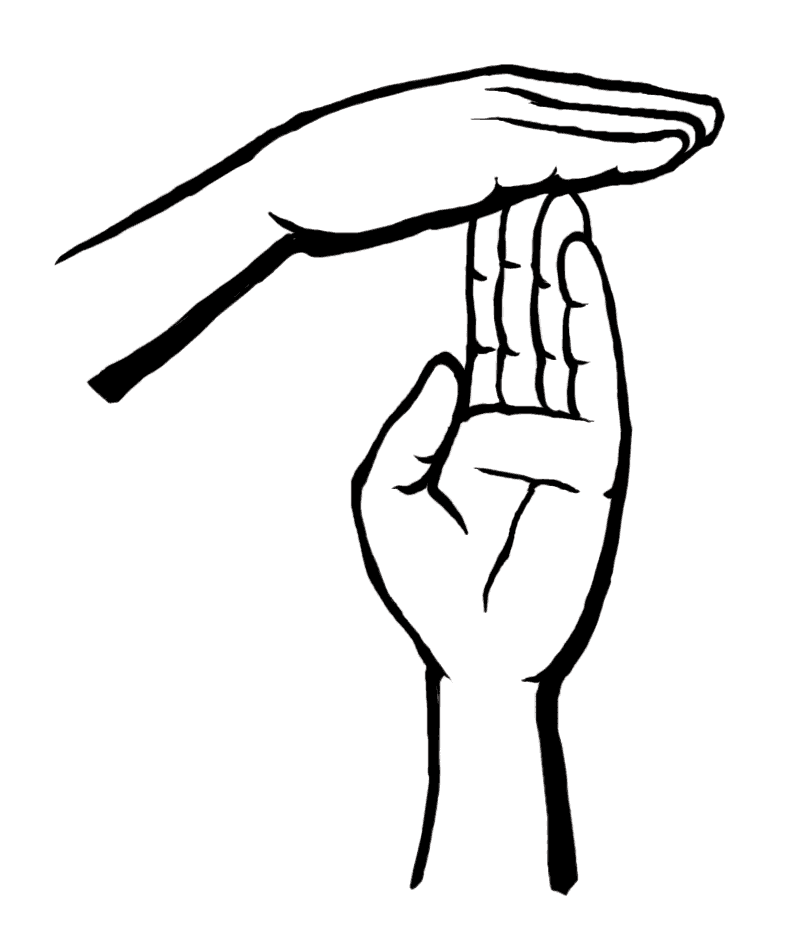
 Language - Make an L shape with your thumb and forefinger to request translation, or to ask someone to use simpler language. This can be especially helpful in any multi-lingual group. Some groups use 'C' for 'clarification' in a similar way.
 Technical point - Make a T shape using both hands. We've seen this used in a variety of ways by different groups, so always check you have a shared understanding. One use of 'technical point' is to interrupt the discussion with urgent factual information not related to the meeting (e.g. 'Lunch is ready', 'Can someone help me set up the tea urn for the break.') Another is to jump the queue with a facilitation suggestion, e.g. 'Can we break into small groups for this conversation?'
Take a look at our guide to Hand Signals (PDF) for more examples.
Agree which hand-signals to use: There are lots of different hand-signals out there, and groups use them in many different ways. They work a lot better if everyone is clear about which signals to use in the session and what exact purpose they have.
Think carefully about how many hand-signals you actually need. It is tempting to have hand-signals for everything from 'tea break' to 'I want to make a proposal'. However, if you stick to just a few signals, people are more likely to remember what you agreed they would mean.
Explain the hand-signals in use clearly at the start of the session. This makes it less intimidating for someone who's turned up new, and doesn't understand what's going on! It also prevents situations where people are using the same signal to mean different things.
Some hand-signals can be disempowering. For example, some groups use gestures for 'I disagree' and 'You've been speaking too long'. In general it’s less hurtful to communicate these messages in words.
any number of people
A tool that's used in conjunction with hand-signals. It simply involves asking people to raise their hand/forefinger when they wish to speak, and noting them down in order. They are then invited to speak in that order.
A speakers list can make it very visible who is talking more than others. A variation is to give priority to people who have spoken less, rather than strictly following the order of the list.
Be aware that speaking in the order of raised hands can make for a very disjointed conversation. Someone may have raised their hand to respond to something that was said, but it is no longer relevant by the time it is their turn to speak! This can make it harder to stay focused on listening to what is being said.
1 - 3 minutes per person; 3 - 30 people
This is a really useful tool for hearing from everyone in the room on the same topic. Everyone takes a turn to speak on a subject without interruption or comment from other people. Go-rounds help equalise participation and give everyone some clear space to express their opinion.
Allowing people to pass: For some people, a go-round will feel artificial, or like they are being put on the spot. It may be difficult to listen to other contributions at the same time as rehearsing what they are going to say when their turn comes. It helps to allow people to 'pass', and then get a second chance at the end when everyone has spoken.
Time: Go-rounds can take a lot of time, depending on how many people there are in the room and how much people have to say. If time is an issue, you could set a time limit or model an answer of the length you want. You can also encourage people to keep contributions short by keeping the question(s) simple.
 Any number of people
This tool allows people to consider and take their time in voicing their views as they don't have to be afraid that someone else might jump in. It also makes people conscious of when they interrupt others.
You can use a stick or almost any other distinctive object. Place the object in the centre of the group. People take it from the centre when they want to speak, then return it when they've finished. Only the person holding the talking stick is permitted to speak. You can set a time limit for how long each person is able to speak, if necessary.
Be aware that a talking stick can have 'hippy' associations which would be off-putting for some groups. Choose something that will resonate with the people you're working with, e.g. a hammer, a kid's toy, a fancy hat etc.
Any number of people
This can be used to equalise how many times each person contributesin a specific discussion. Each person is given the same number of matches (one to five matches depending on time available.) Every time someone speaks they give up a match. When someone has used all their matches they may not speak again until everyone else's matches are gone too. Decide beforehand whether people may give their matches to other members of the group.
5 - 15 minutes; 2 people per group
This tool creates a space where everyone is heard, enabling participants to explore and formulate their own thoughts or feelings on an issue without interruption. It can help people to gather and consolidate their thoughts before a group discussion. This is especially useful if the topic is complicated or likely to bring up strong feelings.
This tool can also be used as a workshop exercise for people to practise their listening skills.
For lots of people, paired listening will feel less 'natural' than a back and forth chat, where both people are putting forward their own points at the same time as listening. Paired listening definitely has benefits: focusing on one person at a time can give them the opportunity to take up more space - which can be helpful even if it isn't comfortable. It also encourages people to listen in a much more focused way than they do when they're also trying to speak their own thoughts. However, it will feel much more challenging or artificial for some people than others - whether for personal or cultural reasons. If you think that this extra layer of challenge would be unhelpful for some people in your group, simple paired conversation could be an alternative.
5-20 minutes; any number of people
Participants move around the room, and have a series of paired conversations, each with a different person. This is an easy way to mix up pairs, and the element of movement will make it more dynamic. If anyone doesn't find it easy to manoeuvre around the space they can stay where they are sitting, and let the minglers come to them.
If people have strong feelings about the topic, or they have to think hard about it, they may not like having the timing tightly controlled by the facilitator. On the other hand, if everyone finishes their conversation at different times, then some people may end up walking around without a partner, feeling left out! In general, this tool is useful when you want to increase energy and interaction levels, but the actual conversations people are having aren't too 'heavy'.
Also known as 'speed-dating' (or 'speed-friending'!) This tool is similar to a mingle, but people are arranged in concentric circles, so it is obvious who their new partner is when they move on. Only half of the people have to move in order to switch partners. This makes it a better version if not everyone in your group finds moving easy and comfortable.
The practicalities are slightly different depending on how you arrange the chairs, so for simplicity we've described the process twice!
As with Mingle, this tool involves interrupting people's conversation mid flow, so it is better for topics that aren't too 'involved'.
Time dependent on task; 2 - 15 people per group
There are many benefits to splitting into smaller groups or pairs within a meeting or workshop. For example:
Balancing out how much people participate: Large groups can sometimes become dominated by a few people or ideas, stifling creativity and the contributions of others. By contrast, smaller groups allow time for everyone to speak and to feel involved and can be a lot less intimidating.
Raising the energy: More people are actively participating at the same time, so energy levels are likely to go up.
Discussing emotionally charged issues: Many people are more comfortable being open about their feelings or voicing controversial opinions in a smaller group.
Easier flow of discussion: Many topics can be discussed more effectively in a smaller group - for example a detailed topic like agreeing the layout of a leaflet.
Efficiency: Small groups allow you to cover several different topics at once - with each group taking on one topic or task.
Participation levels within small groups: Small groups aren't always productive and participatory! Sometimes one or two people do all the talking, or the conversation drifts onto more general chat. It helps to give the groups very clear instructions for what to talk about, e.g. questions printed out for them to answer. You could also ask the groups to appoint a facilitator and a time-keeper. Sometimes you might get involved as a facilitator in a group that is particularly struggling.
Feed back without repetition: If all the groups have been discussing the same topic, feedback can involve going over the same ground a lot of times. Ask groups to only feed back new points. If each group has a long list, ask them to prioritise a few key points.
Accuracy of feedback: It is very easy for the person who feeds back from a small group to represent their own views, rather than summarising the whole discussion. Allow time for the group to agree what points they want to share. Or ask anyone to share points that particularly struck them as individuals rather than trying to summarise the whole small group conversation.
 10 - 30 minutes; 5 - 15 people
A tool for sparking creative thinking and quickly gathering a large number of ideas. It can be used for two different purposes:
Problem solving and decision-making: ideastorms help to open up lots of possibilities, rather than getting stuck on the first idea someone came up with. This can support creativity and thinking outside of the box. Ideastorms also makes space for a wider variety of people to put forward their ideas. If you always go with the first possibility, you tend to lose the input of more reflective thinkers, or anyone else who is slower to put themself forward.
Pooling knowledge: an ideastorm can help to find out what people already know about a topic. For example, in a workshop, this format allows the group to share their knowledge and creativity with no 'top down' input from the facilitator.
Ideastorms work best when there is no discussion or comment on other people's ideas. People can be inhibited if they feel like their ideas are being criticised. Discussing ideas can also slow down the flow of new possibilities. Encourage participants to hold back their comments on other people's ideas. Structured thinking and organising can come afterwards.
A roving ideastorm increases the level of participation and gets the group physically moving (if they want to). Several small groups create ideastorms around different (but related) topics. After a time limit, each small group rotates to a new topic. By the end, each group has spent some time thinking about each topic.
In a workshop about doing effective publicity, each station could be dedicated to evaluating a different poster, with questions for the groups to answer like: ‘What things about this poster make it easy to pick out key information?’, ‘Who do you think this poster would appeal to?’ ‘Is there anything about this poster you would change?’ The process of analysing the different example posters could then build up to the group creating criteria for effective designs.
As people move on to a new topic, they will need to be able to read the ideas of the previous small groups. Ask people to write as clearly as possible and to come up with wording that other groups will be able to understand.
The new group just adds extra ideas other groups didn't think of. This means that they have less work to do as they progress, because most of the ideas will already have been thought of. You can reflect this in the time limits you set. You might give them six minutes on the first topic, five at the second, four at the third, three at the fourth etc.
This is a way to bring out a large amount of information very quickly, and increase energy and participation levels. For example, running this exercise on ‘What I appreciate about this group’ can work well at the beginning of a visioning day, collecting a large amount of positive information.
It can also be used to ‘warm’ people up on a topic. For example, if a group is familiar with facilitation, you could warm them up to the topic by asking them to do a post-it note race of 'facilitation tasks to help a meeting run well.' This could then be followed by a reflection and group discussion.
Give everyone a stack of post-its and a pen. Tell the group they have X minutes to complete the task - 1 to 3 minutes is usually enough.
Ask them to write separate ideas on different post-it notes, and arrange them in a long line. The objective is to make the line as long as possible, or to get from one end of the room to the other. Anyone who can't move around easily, or get down to the floor has the option to give their post-its to someone else to add to the line.
When the time is up ask the group to stop. Everyone can move around to see what has been written, or the facilitator / a group member can read the post-its out.
For a competitive variant, participants could be in equal size teams, and race to see who can get the longest line in the time.
Be aware that such a fast-paced game doesn't allow many people to do creative or analytical thinking. It is better for quick-fire revision of a familiar topic.
Prioritisation tools help you spot quickly which ideas people think are urgent, important or useful.In this section we offer several quick and easy methods to gauge people’s opinion.
When using prioritisation tools, bear in mind that this is not the same as a majority vote. People may be happy to let go of ideas which aren't a priority for a majority of the group. However, if an idea matters a lot to one or two people, it is important not to dismiss it without discussion.Rather than automatically dropping the less popular ideas, you could ask people to explain why they are important and potentially keep them on the agenda.
It can help to keep a record of all the ideas. Even if you don't have the capacity to address them all immediately, they can feed in to later discussions.
2 - 5 minutes; any number of people
Obvious but effective. Run through your list or agenda and get a preliminary show of hands on how important each item is to everyone. Those options that have less support are good candidates for being set aside.
3 - 5 minutes; any number of people
Another quick and visual way of testing the range of opinion within the group. You can also use this tool to bring out differences of opinion that aren’t being voiced.
Remember that a temperature check isn’t a majority vote. For example, if only one person really needs a break, it could still be a good time to stop!
5 - 10 minutes; up to 50 people
This tool helps to whittle down a long list of options to something more manageable, for example for choosing a few topics from an ideastorm to focus on. It creates a more detailed visual picture than asking people to put their hands up.
It is also a way of getting people moving if they have been sitting down for a long time. Make sure to include an option for people who don't want to move, for example they could instruct someone else to place their dots.
It can be done during a break to use as little session time as possible.
Write up a list of the ideas. Give everyone the same number of dots, 1–6 usually works. The dots could be stickers or simply marks they make with their pen. People can 'spend' their dots on their priority items. If you give multiple dots or stickers, people have the choice of spending them all on one item that they feel is really important/urgent, or spreading them across a number of options.
These tools enable you to explore ideas in much more depth, compared to the 'quick and easy' prioritisation tools above.
In most cases it is useful to remember that your options aren't necessarily limited to the ones that are currently on the table. If you can't decide between two ideas, can you find a new option that combines the benefits of both, and addresses key concerns?
You can use these tools to get a better understanding of everyone's priorities, even if you don't end up going ahead with any of the options exactly as they are.
Be aware that these exercises are very structured, which will work very well for some people, and will feel too constrained for others. You could try 'softening' the structure with a bit of flexibility, e.g. giving people permission to say things they really can't hold in, even if it doesn't totally fit the structure you are imposing.
15 - 30 minutes; 3 - 20 people per group
This tool can be used to decide between different options and to identify different needs and priorities around an issue.
For each idea list the benefits (pros) and drawbacks (cons) and compare the results. Most group will benefit from a third category of 'other' or 'interesting' to mop up any points which aren't obviously a pro or a con. You could do this in the form of a table or a mind map.
This can be done as a full group, in pairs or small groups with feedback. You could also task small groups to work on the pros and cons of a different idea each and then report back to the group.
Sometimes groups find it helpful to score the pros and cons according to how significant a benefit/problem they are. For example, if a shared household was choosing a new kitchen table 'we can't afford it' might be ranked as 9/10, and 'we don't like the colour' might only rank 2/10 because it could be re-painted.
You may find that you don't all agree on what is a pro and what is a con. Or you might have different views on which pros and cons are most significant. This can be a great starting point for discussion about your differences. However, it helps to think in advance how you will take differences into account when recording people's answers. For example, record the same point in both the pros and cons column if people don't agree. Or instead of trying to find a definitive whole-group score to measure how significant each point is, use a tool that allows each person to give their own answer. For example see Temperature checks.
'Pros and Cons' may not be the best language for every situation. Alternatives include: pluses and minuses, strengths and downsides, opportunities and challenges etc.
10 - 20 minutes; 3 - 50 people
 A classic time-management tool that can be applied to group prioritisation! The group maps ideas according to their urgency and importance. You can use this tool on paper, or drawn out on the floor. If you are using the floor, it is best to mark the lines using string or masking tape, so that it is easy to see the whole grid. Add labels at the end of the lines to remind people what they mean.
10 - 20 minutes; 5 - 20 people
This is a great technique for using in small groups. Write each option on a card or post-it note and give each group a full set of cards/notes. Set a time limit and ask the groups to rank the options, or reduce the options to, say, three. Having a facilitator in each small group will help. It’s also helpful to set out clear criteria at the start - for example: “You’ve got 15 minutes. We’re looking for options that need to be done most urgently, are most important, and yet realistic within our budget. Also we’ve only got a week to make it happen, so please think about what we can realistically achieve in the time available.”
30 minutes - 1 hour; 5 - 20 people per group
This tool encourages a group to look at a situation from a new angle. Each 'hat' represents a different way of looking at something. The roles the 'hats' bring give you a chance to thoroughly examine every option and to prioritise or choose the best one(s).
There are a number of ways to do this exercise. For example, individuals within the group can wear different hats whilst the group discuss an issue. Another alternative is thatthe whole group can 'wear' each of the hats in turn in order to look at the same issue in lots of different ways. As facilitator you may want to think about the order in which the group wear the different 'thinking hats'.
Below is one possible order for a creative problem solving process.
White hat: White hatted people concentrate on the facts - what information and knowledge do you know about the situation? What can you learn about the situation from this information? What info is missing? Can you plug the gap? If not can you take it into account when discussing the situation? What can you learn from past trends?
Green hat: Green hat people think creatively in a no-criticism, free-form thinking kind of way.
Red hat: Red hats are the emotional input of the discussion. They allow themselves to be intuitive and act as much on hunches as fact. They are sensitive to the emotional responses of others in the group.
Black hat: Black hatted people evaluate ideas logically, and look for reasons to be cautious.
Yellow hat: Yellow hats should think optimistically - looking for the value in every possibility. What benefits does it bring?
Blue hat: The blue hat is worn by the facilitator(s). They concentrate on process, calling on the other hats to add in their thinking as and when it's appropriate and making sure that each option is scrutinised from all perspectives. They are neutral, helping the group achieve it's task without trying to shape the decision.
This tool actively seeks out the optimistic analysis, the pessimistic analysis etc., so every idea is thoroughly tested and when the decision is made, it's made on the basis of a creative and thorough process.
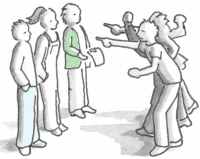
Here are some tools that are useful when dealing with challenging issues in the group. They are designed to bring issues into the open, and help people express themselves and be heard. Bear in mind that working with conflict requires both skill and experience. One option is to stop the meeting and seek help from experienced facilitators, such as those at Activist Mediation Network
A small number of people participate in a discussion, while everyone else watches and listens. This allows for a more naturally flowing and in depth conversation than is possible when everyone is contributing at once. It creates a space where some people will find it easier to say things in front of the whole group. This means it can sometimes be used to explore a contentious issue. There is an option for audience members to 'swap in' if they want to join the conversation.
Being part of a small group in the middle may make it easier for some people to voice things they wouldn't usually say in front of the whole group. This could be helpful, but it could also lead to people saying more than they would have chosen to. Other people may find the fishbowl set up very exposing, and so be less likely to join in. It can be good to build trust in the group before using a fishbowl for contentious topics.
Consider mobility issues if you are asking people to swap in and out. Simple adaptations we can think of are: leaving a gap in the inner circle of seats, so that a wheelchair-user can join the fishbowl; creating an exception so that someone who finds it difficult to get up and move places can join from their 'audience' seat.
30 minutes - 1 hour; 3 people per group
This tool is helpful when two people find it difficult to listen to each other and understand each other's concerns. Their conversation goes through three stages, each with a different 'rule'. The aim of this very structured exercise is to establish more careful listening. The rules gradually relax as the listening improves.
Form a group of three, one observer and two speakers/listeners. The observer makes sure participants stick to the format and helps out if necessary.
Stage one: The first speaker talks on an issue. They should focus on essential points because listening will require a lot of concentration. The listener repeats word for word what the speaker has said. Only then are they allowed to answer.
Stage two: The listener summarises what the speaker has said and then answers.
Stage three: When answering the listener addresses all issues and concerns of the speaker.
Often the reason that people can't hear each other very well, is that they are feeling upset and angry - not that they don't have the skills to listen. In this situation, a structured conversation with a lot of rules may not be what people most need! Make sure people understand how the tool will work, and only use it if both people are genuinely willing.
15 - 40 minutes; 5 - 30 people
Withholds are thoughts that we keep to ourselves. They usually have to do with judgements about ourselves, others, or what is happening in the group. For this tool to work there needs to be a culture of listening to and accepting each other, which may take some time to achieve. It may be helpful if the group commits to putting aside enough time to relax together and do this exercise.
Set up an unstructured round asking people to make statements beginning with: “If I could change one thing in the group it would be...”, “What upsets me about this group is ...”. Do not allow anyone to respond to the withholds or start a discussion. Make sure that everyone has a say - it is highly unlikely that someone is completely happy with a group. At the end of the round, see if any themes have emerged and if anyone wants their issue discussed.
30 minutes - 2 hours; 3 - 30 people
A meeting which is solely concerned with feelings. Many groups hold regular feelings meetings to catch any problems early. Participants do not have to deal with decisions and actions. Such meetings allow the group to involve and support members as whole people and to resolve concerns, problems and conflicts before they become too serious. It helps to use tools such as talking sticks or go-rounds to encourage active listening.
Encourage people to speak for themselves, rather than assuming that others share their feelings. Begin by asking people about where they are at in their lives outside the group. This will give a context for everyone's reactions when you come on to issues within the group. Listen for what is not being said. For example, some people and groups find it hard to admit to negative feelings and tiptoe around conflicts. Create a safe enough space so that people feel able to open up.
20 minutes to 1 hour; 5 - 100 people
These can help to explore the different views or needs around an issue within the group. People in a group place themselves somewhere along a physical line to show how strongly they agree or disagree with a statement.
Controversial topics: Spectrum lines are often used to bring differences of opinion into the open. In an ordinary conversation, people might not speak up if they think the rest of the group won't agree with them. In a spectrum line, you get an indication where everyone in the group is at - which can then be the starting point for more discussion.
Personal needs and preferences: Spectrum lines can be used in a similar way to explore more personal differences, for example what needs people have from a shared work or living space.
Gauging commitment to different ideas: If you have several possible ideas on the table, spectrum lines can help you work out which ones people have most energy for. This may show up a clear favourite. Alternatively it could be a springboard for more exploration, e.g. 'What would we need to change about this idea to increase your level of commitment?'
Controversial topics: This tool can have the impact of 'stirring people up' on a topic, so think about whether that will be helpful, and whether you are well-placed to help people navigate any conflicts. It also makes differences very visible. This could be difficult for anyone who feels isolated in their opinions, or is anxious about being judged. This would be particularly the case in a situations where people got status for particular opinions, e.g. because they were seen as more 'radical' or more 'committed'.
Physical considerations: If a spectrum line involves long discussions people can end up standing for a long time, which won't be comfortable/possible for everyone. Unless you have a lot of space, people can also end up quite cramped together, which could make it harder for someone to manoeuvre their wheelchair around. Adapt the exercise to suit the people and space you have. For example, you could scatter chairs around the room for people who need to sit down. Or you could give people the option to contribute from their existing chair - it's good if you have at least two people doing this, so they have someone to talk to during the 'chat to someone near you' stage!
10 minutes - 3 hours; 5 - 100 people
Roleplay involves people acting out a scenario, to explore different reactions and practise skills. They could take on a specific role, that involves acting as someone else (for example police officers at a protest). Alternatively, they could simply participate in the scenario as if it were happening to them.
If you are helping people prepare for a demonstration, you could ask someone to roleplay a person whose journey was delayed by all the crowds in the street. Spend time exploring what might be going on for this person, and practising different ways of responding. This can be much more powerful that simply talking about how you'd react in different scenarios.
This gives participants and observers the chance to reflect on and learn from what has happened.
Exposure: For some people, roleplay can be embarrassing, especially if they are being watched by the rest of the group. Some people will find it more difficult to play a part than to act as themself - and vice versa! It can help to start with paired or small group role-plays, where people get to participate without feeling like there is an audience. Roleplay with the whole group could be done with one or two people volunteering to take on parts, and everyone else participating as themselvesor observing.
Misrepresenting people: Roleplay can be a powerful tool for feeling your way into someone else's perspective. At the same time, there is a risk that asking people to imagine someone else's perspective could end up reproducing stereotypes, hurting other participants’ feelings or just not be very realistic. In particular, avoid situations where people role-play members of a marginalised group they aren't part of. Ask yourself:
Is roleplay the most appropriate tool? Could you find out about different perspectives by finding people in the group who can talk about their own experiences?
How can you help people prepare so the roleplay is as useful as possible? Can you ask people to reflect on relevant similar experiences they've actually had? Or give them information to help them (e.g. common police tactics for people role-playing cops).
Strong feelings: Roleplay can bring up lots of emotion. This gives depth to learning, but can also make it harder to move on if people don't get a chance to process those feelings. Allow enough time to get out of role. Be aware that a specific role play will affect people in different ways.
For more on using roleplay, see our guide on Facilitating Workshops.
 This is a simple and quick variation of roleplay. It is sometimes called ‘hassle lines’ or ‘parallel lines’. It is a great tool for:
people exploring their emotional responses to a situation
looking at body language
preparing for a particular situation such as aggression from the public or the police during a protest or action
As with any role play, make it clear that anyone who isn't comfortable participating is welcome to act as an observer.
The format of two lines and people moving towards each other at the start can increase the adrenaline, which may help people get into it. For a calmer mood, pairs could simply find a space, and begin when they are ready.
These exercises aim to build trust in a group. They involve sharing personal stories and feelings with each other, or helping people connect in a less verbal way.
Generally, people gain trust for each other when they take risks together and 'succeed'. What success looks like will depend on the situation. For example, not hitting the floor in Trust falls, or getting a supportive response to the story they tell.
Risk is a tricky thing to get right. People need to leave their comfort zone, but not stretch themselves to the point of panic! Consider:
Different types of activity: Be aware that people will vary massively in terms of which activities bring a helpful level of risk. For example, we all have very different experiences of talking about our feelings, making physical contact or being 'silly' and playful. Use a balance of different types of activities to help different people get the benefit.
Let participants choose their level of risk: Make sure that the participants have as much control as possible over how they engage. Let people know what an exercise involves, so they can make an informed choice about whether to join in. If people are sharing personal information, choose open-ended questions where participants can decide what they want to share about themselves. If people are doing an exercise in groups or pairs, encourage them to start with a discussion about how to make it work for them.
Peer pressure: Even when a group as whole seems to be comfortable with something, there are likely to be individuals for whom it is more difficult. These people may feel peer-pressured to join in, possibly past a level that is actually helpful for them. Use modelling and encouragement to make it easier for people to pick their own level.
Consider any access requirements that participants have told you about. Trust building exercises could be counterproductive if you set them up so that not everyone has the choice whether to join in!
1 –2 minutes per person; 5 - 20 people
This game gives people the chance to get to know each other, by talking about an object that is important to them.
Not everyone will be carrying a personal object that they want to talk about! You could tell the group about this exercise in advance, so they can choose an object to bring from home. Alternatively, just acknowledge that the objects people have with them may be a bit 'random!' This could put less pressure on people to produce an interesting object, or to talk about personal things!
 20 - 40 minutes; 6 - 20 people
Another 'get to know you' exercise that combines creating pictures, having conversations in pairs, and a shorter whole group introduction section.
As with Pair introductions, when people introduce their partner to the group, there is a risk of misrepresenting them. We prefer to give people the choice.
It is also likely that some people will feel uncomfortable drawing / doing 'art'. Others may have difficulties using pens / scissors. Make sure to offer different options for creating the image. For example, you could encourage people to rip paper instead of cutting. You could also offer a gallery of images, that people can choose something from that relates to them. These could be pictures of people, animals, objects or landscapes.
15 - 30 minutes; any number of people, depending on space
People take turns to take their partner on an eyes-closed walk around an outdoor space, exploring natural objects with all their senses, other than sight.
There are a number of elements of this game that won't be comfortable for everyone. For some it might be closing their eyes in public, for others being led around by the hand, for others touching objects without knowing what they are going to be. Allow time, and give examples of ways the exercise could be varied, to help people spell out to their partner what things they're OK with, and what things they're not. For example, if someone didn't want to be led around by the hand, their partner could just collect objects for them to explore with their eyes closed.
10 - 15 minutes; 10 - 20 people per group
A game that involves building trust without talking. Everyone who wants to has the chance to stand at the centre of a circle, and fall with their eyes closed, knowing their team-mates will catch them. This can be a lovely, relaxing and enjoyable game that brings groups together, but it obviously carries some risk.
Up to a point, individuals can choose their level of risk with this game, because they can choose how tight the circle is. However, this game won't be accessible to everyone - it relies on feeling comfortable being touched, and on people being physically able to catch and hold each other. Think carefully whether it will be appropriate for your group.
5-10 minutes; any number of people
This is similar to the trust circle, but allows a lot more people to have a turn at the same time. It may also be easier for people to find one person they are comfortable doing the exercise with, compared to the whole group.
Be aware this won't be suitable for all bodies, so consider accessibility requirements before introducing this game!
 5 - 15 minutes; any number of people, depending on space
A trust exercise that doesn't involve talking or physical contact. Pairs take turns to mirror each other's movements. This requires them to tune into each other carefully.
As always this won't be accessible to everyone. For example, it only works if people are able to see well enough to get a sense what their partner is doing! Give people a chance to chat beforehand about anything they can't or don't want to do. For example: "Please can any arm movements be lower than the shoulders."
When people stop concentrating or become irritable in a meeting, this could simply be because they've been sitting and listening for too long. A stretch or a game can re-energise people. Games can change the atmosphere in other ways - from lifting the spirits in the group to creating a quieter, more contemplative mood. They provide an opportunity for people to use their brains and bodies in a different way - which may be more refreshing than a simple rest.
Be sensitive to the group and individual members - the idea is to relax people, not for them to feel embarrassed or isolated. Don't coerce people into playing games. If people don't feel like playing, they could get themselves a drink or go outside for fresh air.
There are lots of energisers and ice-breakers to be found on the internet. We have prioritised games which aren't competitive - or if they are, where we think that individuals are unlikely to feel singled out as 'losers', or feel they are the reason their team lost. We have included some very short exercises for occasions when there's no time to play a full game.We have chosen exercises to work for a range of different access requirements, in the hope that you can pick something suitable for your group.
It can help to think through how you will make games accessible in advance, so you don't get stuck trying to adapt an exercise on the go. Sometimes a short break or a pause to stretch can enable everyone to do for themselves whatever they need to do. This may seem less exciting than a game, but could be better than a 'fun activity' that only some people can participate in!
Any number of people; 1-2 minutes
This very short energiser works well to get people's energy up quickly - or to calm them down if they have tension to release! It doesn't involve physical contact, or too much 'looking silly'.
Of course, this could also be done starting at 10, for example if people are very cold and need the exercise! Or once people are familiar with it, you could count down from three for an even quicker exercise.
10-30 people; 1 minute
This exercise gets energy levels up, and helps people to start interacting, without taking much time at all. It can be especially useful at the start of a workshop or meeting.
Give people a short time limit to shake hands with everyone in the room - usually about one second for each person present. For most people this involves getting up out of their seat. Invite anyone who needs to to stay in their seats, and remind the people standing up that they will need to go to those people to shake their hands.
Not everyone is comfortable with hand-shaking. Asking people to 'high five' each other could be a less intense variant. Or for no physical contact at all, just ask people to greet everyone in the room. In some groups, a nice variant could be for everyone to do the greeting in their own first language.
This quick and popular energiser gets people moving around the space. Each person (privately) selects one other individual in the room to be their 'bomb', and another to be their 'shield'. When you say go, people start to move around, trying to keep their shield between themself and their 'bomb' at all times.
We have included this exercise under the heading of 'bombs and shields' because that is the name that people are most likely to recognise for the game. However, not everyone will want to play a light-hearted game involving imaginary bombs! Try looking for alternative language that is appropriate for your group. For example, we've known hunt saboteur groups using 'hounds, foxes and hunt sabs'.
10 minutes; 5 - 20 people
An excellent game for focusing people and getting them to work together. It creates laughter and energy without requiring movement or physical contact.
With everyone sitting or standing in a circle, explain that they have to count upwards - set a target (usually 10) if you like. Only one person can say any one number. If at any stage two or more people speak simultaneously the group have to go back to 1 and start again. Nor can the same person say more than one number in succession. Some groups will discover a way to 'cheat' (e.g. co-ordinate who speaks using gestures). You could acknowledge their co-operative skills, and then ask them to try again with a twist. For example, ask them to shut their eyes, or turn their backs so they can't see each other!
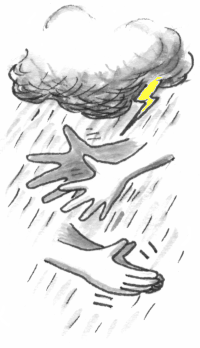 5 minutes; 1–100 people
This is a lovely co-operative game that always brings a group together and lights up people's faces!
Drizzle - gently rub your palms together to produce a whispering sound.
Light rain - move your hands up and down in opposite directions, with the palms brushing against each other, as if you are brushing sand off the palms.
Heavy rain - clap your hands together.
Hail - cup your palms and clap them against your thighs.
10 minutes; 10 - 20 people
Another whole group co-operative problem-solving game with an element of physical contact.
Everyone stands in a circle with their eyes closed. They move towards the centre of the circle with outstretched hands. Each person finds another hand for each of theirs. Then they open their eyes, and unravel the knot without opening hands.
Make two simultaneous groups if there is a large number of people.
10 minutes; 10 - 100 people
A fun physical team version of 'Rock, Paper, Scissors'!
5 minutes; 5 - 20 people
Great for getting people working together and energised. It is physical and needs people to be comfortable leaning on each other.
Think before you call out combinations or you could call out something that is physically or numerically impossible!
3 - 15 people; 3 - 10 minutes
A physical, co-operative challenge that doesn't take too long. It relies on everyone in the group having a degree of flexibility and movement control.
Ask the group to hold hands in a circle. One person starts with a loop of rope or string diagonally across their body (i.e. resting on on the shoulder on one side, and below the arm on the other side.) The task is to pass the loop around the circle without letting go off hands - people twist and wiggle in order to to pass it on to the next person. It is possible for people to help each other, for example stretching out the loop with their foot so it's easier for someone to get out of it. This can involve going into someone's personal space more than simply holding hands, so you could set a ground rule that people ask first.
Not everyone is comfortable holding hands, so pre-warn people, and offer an alternative game or an observer option if not everyone wants physical contact. This game also requires some degree of flexibility and movement control from everyone in the circle.
8-10 people; 10 minutes
This is a co-operative game which is suitable for groups where everyone is comfortable with quite a lot of physical contact. It is quite physical, so may not work for anyone who has an injury or bad back they need to take care of.
In a bigger group you can divide people up into smaller groups, each with their own paper. This is often done by making it into a competition for which team can fit on the smallest paper. However, there is no reason why the small groups can't just do the challenge independently, without comparing themselves to the others.
This is a competitive team game, that can be played with everyone sitting or standing.
Divide the group into 2 teams. Each team takes one end of a double bed sheet and holds it stretched out flat in the air.
Drop a ping pong ball onto the sheet. The task of each team is to manipulate the sheet so that the ball drops off the other team's end - and to prevent it from dropping off their end.
You could play 'first to three', or see which team has most points in a set time frame. Or don't don't bother with counting scores at all, and just finish when you think people have had enough!
5 minutes; 10 - 30 people
This game is mildly competitive - but in teams so no individual is singled out as winner or loser.
At one end of the lines, arrange a bottle or other object so it is equally reachable by the two end people. (If there is no shared table, you could put the object in reach on a side-table or up-turned box.)
At the other end, the facilitator, (or a participant, if you have odd numbers), simultaneously squeezes the hands of the two people with free hands. They 'pass on' the squeeze all the way down each line, until it gets to the final people. They can then open their eyes and grab the object. The team to grab the object first 'wins'.
The two object-grabbers then go back to the opposite end of the line, and everyone moves down so that the next two can take their turn. Or if shunting sideways into the next chair isn't easy for everyone and you have plenty of space, the end people could move to the far end of the line, but the object simply be moved nearer to the next people.
6-14 people; 10 minutes
This co-operative challenge is harder than it sounds! It is suitable for a group where everyone is able to stand and bend/squat down easily.
The group stands in a line, with their arms out, pointing their index fingers. Lay a light-weight bamboo cane on the fingers, and let them adjust their arm heights until the cane is level. Their task is to lower the cane to the ground, with the cane completely level, and everyone's fingers in contact with it at all times. People can't grab the cane, it should simply rest on their fingers. If ever the cane tilts out of balance, or someone's finger loses contact, they need to start again at the beginning.
NB: with a heavier stick (e.g. mop handle) the game will be too easy, it is the lightness of the cane which provides the challenge.
Endings are important. Take time to acknowledge what you've done together, and say goodbye. Where appropriate, share contacts or arrange follow on get-togethers so you can carry on what you've started, or support each other with anything that comes up afterwards. At the very least, people are more likely to go away with a satisfied and positive feeling if they have a sense of closure.
5 - 20 minutes; any number of people
This is similar to a check-in, but at the end of the session. It gives people the opportunity to share how they are feeling. This could be about how they are feeling inside themselves, about the group or about what has been achieved in the session. Check-outs can be run in different formats, for example everyone together as a go-round or pop corn style, or in pairs or small groups.
5 - 10 minutes; any number of people
This tool gives people time to reflect on what they have learnt in the session and how they will apply that learning.
Provide everyone with pen and paper, or even a printed form and give them a set amount of time to answer a couple of questions. Think about what questions would be most useful in your setting. Here a couple examples:
Three things I’ve learnt, Three things I'll do.
Something straightforward I’ll do as a result of this session, and Something that will make a big impact (and may need more effort)
When people have written down their points you can ask them share some of these with each other, either as a whole group, or in smaller groups or pairs. Encourage people to keep hold of their notes so that they can refer to them in the future.
5 - 20 minutes; any number of people
Bring people together into a tight circle, either seated or standing up if that works for everyone. Ask everyone to say some short last things to give a feeling of closure, e.g. how people are feeling or what they are taking away from the session.
5 - 20 minutes; any number of people
This might seem like a strange idea, but it's a lovely way for everyone to take the time to think about what they have learnt through a workshop, and what changes they might make, or steps they might take, in their lives or work because of it. We all know that we often have great intentions of making change but simply never get around to it. However having these intentions, written in our own fair hands, land on our doormats six weeks later could be just the reminder we need.
10 - 15 minutes; 5 - 20 people
A contemplative and fun game. Everyone is given a card with a 'gift' written on it. People then take turns to explain what they will do with their gift. Example gifts are: an apple tree whose fruit has the power to grant a wish to whoever eats it, an empty train that can travel anywhere in the world, and a cloak that turns the wearer invisible.
When we use this exercise at the end of workshops, people tend to use it to refer back to things that have been said during the training. An alternative would be to use it at the start - in which case it might function as more of a getting to know each other game.
Evaluations give us the chance for honest feedback on the process and content of our workshops and meetings. This in turn helps us learn how to be more effective and make our sessions work well for everyone.
Everyone who participated in an event should be encouraged to take part in its evaluation. Bear in mind that there will be differences of opinion and that it is not necessary for the group to come to agreement on the matter.
To plan a useful evaluation first work out what information you would like to get. Then think what questions you need to ask and what format will be best. For example, you might want to hear about the content of the session, the process the group went through and the experience of individuals within the group. Make sure your format includes a chance to hear what was successful as well as what could have gone better.
How much information you can get from the evaluation also depends on the available time. The more detailed, the longer it will take. If you are aiming for a detailed evaluation, be prepared in case your session takes longer than you had planned. People often resent overrunning, so it might be worth having a very quick evaluation tool up your sleeve.
A simple and quick tool. Get people into a circle and ask everyone to share one or two key things they are taking away from this session. This rapid review can help people notice what they have learned as well as giving you valuable insights into what learning people valued most.
This is a simple evaluation tool, where you ask everyone to share what worked well for them and what worked less well. It's a good idea to also allow people to add 'any other comments', e.g.:
Worked well: great visuals; the spectrum line exercise
Worked less well: too much jargon; not enough practising
Other comments: can we do a longer in-depth training
You can run this exercise in two different ways:
Write the questions on a flipchart each. Then ask people to write their feedback on post-its and stick them on the relevant flipchart. This is quick, friendly, anonymous, but yields only brief comments without the option of asking clarifying questions.
A round where everyone takes a turn to verbally share their feedback. You can record this on a flipchart with three columns. This is more time-consuming, but you can ask people clarifying questions and people often build on each other's comments.
Well designed evaluation forms can provide more detailed information than other methods.Think about what information will be useful to you and design questions accordingly. This could include people's overall impression of the workshop, whether it met their expectations, what they thought about the way it was facilitated, what worked well / less well and any other comments. Take care to phrase questions neutrally. It may be useful to include ways of scoring different aspects of the session.
You can either ask people to fill in the forms there and then, email them out to everyone or send people a link to an online survey tool. An advantage of filling in the forms at the end of the session is that you won't have to chase people. However, you may get less detailed feedback from those who like to reflect on the session first.